Furnished By Hand

Painting a Tiny Living Room With White Paint

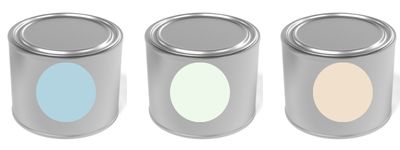
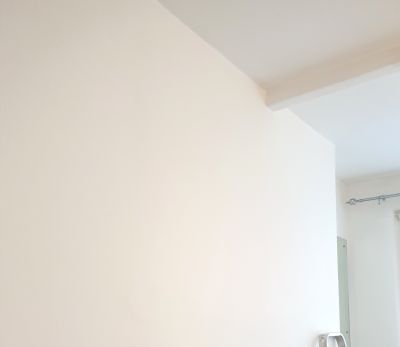
We learned two things in 'DIY Wall and Ceiling Paint', firstly we happen to  live in a very tiny flat, and b) the best way that we've found to increase the sense of space in the tiny rooms, is to use white paint on the walls and ceilings.    We have experimented with other paint colours, such as eggshell blue, off-white and magnolia paints.
 We  used colour as an accent on the smallest wall (tiny alcove), in order to create depth. but the room really was too cramped to produce the desired effect.
Eggshell Blue, Off white and Magnolia Paint Tins
Our building is 17th century and has a lot of 'character' (read issues), so these bright colours didn't appear solid and uniform on the walls.
I should mention that the gigantic tree canopy outside the window casts a mottled shadow over everything. During stormy weather, we need to turn the lights on. 
Asides from the light coloured paints, we had the most success with contrasting white ceiling, skirtings, frames and doors with light grey walls. While that looked quite elegant, there was a strange sense of being stuck in a cooking pot.

The Tiny Living Room Revamp

Needless to say, none of those paint colours complimented the space in our tiny home, infact they had an even worse effect in our tiny hallway(read crawl space), but that is a story for another day.
black and white check cushion
Since those experimental days, we've stuck to painting all of our rooms (ceilings, walls, frames, skirtings, exposed pipe-work and doors) in brilliant white matt paint.
Colour is infused through the use of soft furnishings, wall art and floor rugs. Plants are another great way to add add an interesting feature in a small room.
As with all good projects, we drew up a stage by stage plan (mostly in our heads).   Here is what we did:

Stage One - Search and Delete

We needed to clear out all the bits of 'stuff', especially things that had accumulated in the white storage box. We don't hoard things, but we do prefer to repurpose rather than chuck thingd out.
We piled everything in the middle of the room. The idea was one pile to donate to other creatives, and another pile for my lovely ebay-savvy neuighbour.  Well my lovely ebay-ing neugibour took the lot (to repurpose for her outdoor den), leaving us with a (mostly) blank canvas to work with.
A whole bunch of stuff in the middle of the room

Stage Two - Assess The Condition of The Ceiling and Wall Surfaces.

Full Disclosure

The walls that you are about to see are gross. They are gross because we are short on space around here, so I had opted to revamp the window box seating 'on site'. That project involved foam spray glue, cotton and wool filling.
dirty white wall
At first, the walls were protected with plastic sheeting, but the sheeting got stuck to everything: to  the walls, the project, my fingers.  It became more of a hinderance, suffice to say the walls you see here are covered in foam spray glue, dust, cotton, wool and Dacron.

Stage Three - The Clean Up

The clean up process involved a weak soap and water solution and in some places, a light solvent.   As I was already cleaning the dirty white window box seat, it was easy to approach the room as one surface clean everything:  the walls, ceiling, skirtings doors, and window frames. 
wall, window box and step 3

Stage Four - Filling The Gaps

Luckily the surfaces in our living room are reasonably sound, as any gaps or holes on the walls and skirtings have been filled in over time -  there aren't really any left to fill. It was always a fairly easy process too, despite the really old walls.

Stage Five - Sanding

The idea was to create a blank canvas to add colour too. I decided to approach the room as one surface and sand - down everything.   When it comes to sanding down surfaces, I am NOT an expert by any stretch.
 My method is to feel around for bumps, lumps and imperfections. and then sand them down to create a more even surface.   I made sure the surfaces were as smooth and bump free as possible during this stage..

Stage Six - Wiping  Surfaces Clean

The living room windows had been left open to release dust while sanding, and the doors had been kept closed to protect the rest of our home.  The entire room was wiped down throughly with a damp cloth. I made sure that the skirtings, frames and doors were free from dust too
This is an essential step, as if it's skipped,  the paint will become gritty and textured. The bits will accumulate on the roller or brush and then on to the painted surface, which WILL be visible.
wipe walls

Stage Seven - Painting Walls and Ceiling With Stain Cover

The very old brickwork in our flat, 'bleeds' through to the surface. The bleed creates  faint  orange splotches, which is most obvious on the walls. We've tried a lot of solutions to block the patchiness, including thick lining paper, lots of thin layers of lining paper, wall paper , pva glue, etc.  We were advised to use a stain cover, so we tried a few brands but finally settled on this one - because we really haven't found anything as effective.
Wall covered in 2 coats of Stain Cover
 We bought 2 litres and applied two solid coats(not thick) to the walls and ceilings. The stain cover went on smoothly with a white mat finish. I was very pleased indeed.
My advice: if you've got walls that have become stained from cooking, smoking, water damage or old brick-work that leeches through, apply a few coats of stain cover before applying your top coat, it works wonders. It's also really effective for dark walls that need a solid colour change.

Stage Eight - Painting Walls and Ceilings With Top Coat

A few years ago, we had our home painted by a professional painter called Calmore. He painted the living room so well that we asked him to paint the hallway too.  He had seen our 'type' of walls many times before. We made a mental note of how particular he was about about certain brands of stain cover and top coat paint for the walls and ceilings.   To be sure that we always get the same impressive results that he did, we've always bought and used the same paints that he used.
Wall and box seat painted with stain cover and top coat 400 x 300
All Done. As you can see the walls are smooth, clean and fresh.    walls are uniformly white without patches or any sign of the foam spray glue and dust that covered them before.
 It really didn't take long at all as the paints are quick drying and we always keep large fans on to help hasten the drying time. The outcome was really encouraging, so much so that I have decided to revamp the hallway and the bedroom soon too.
cross