Furnished By Hand

The Window Box Seat

Bay Windows

We will start here, as this is where the idea for window seating originated.  A bay window is an 18th century British decor feature. It reminds me of an enclosed ground-floor balcony that consists of three or more separate window units.
It protrudes out (stands proud) of an outside wall of a building, and it essentially increases the space inside a room.
The structure of bay windows is often angular because of the arrangement of the window units. It looks like half a hexagon.
bay window exterior

Bow Windows

bow window
A bow window on the other hand, is the less angular and more curved (bowed)version of a bay window. This is definitely my favourite version of this style. 
It looks like a half-circle. Bay or bow windows are usually situated on ground floor walls.
In older cities, for example,  Central London, there are many buildings with Oriel windows
These are bay windows which are located on the outside wall of the upper floors of a building .
grid of 4 ornate oriel window exteriors
The inside of a bay window, creates extra space in a room, enough to stand or sit in, while on the outside, the protrusion adds a beautiful accent to the main walls of a building.
The space inside of the bay, often has a low bench or box-storage unit built underneath the window..
Couch or sofa cushions can be placed on top of the bench or box-storage to create seating or bedding. 
The same can be done , on a balcony, in a nook under stairs, in a wall alcove, on the patio, in a kitchen breakfast nook, a bathroom nook, or in a conservatory.
You'd need to use the right fabrics, padding and thread, depending on your project.
For example an outdoor 'window seat' arrangement, would require decor textiles that are waterproof and easy to wipe clean.
But wait..... we are talking about 'Window Seats Cushions', so surely there is always a window in the mix?
 Well yes and no.  Because the method can be applied in so many different locations, the operative word is seat.
view from atrium
Whether it is on a balcony, an indoor nook or an outdoor patio, the seating arrangement allows you to view your surroundings from a different perspective - that's the window aspect.
And that's all we are going to say on the matter.
(Phew...It took a full 10 minutes to come up with that explanation...)

My First Encounter with the Window Seat Cushion

It was a picture-perfect spring morning. The vibrant blue sky, the sun streaming through the tree-tops, crisp morning air and chirping birds.
Jazz music was playing in the background as we painted our little hallway and sitting room. 
Then it happened:
My in-laws called to say they'd be coming around for Sunday lunch the following day.
Head Speech:
Huh?? I don't understand...
We'd had our flat for a few months, and had planned to decorate it to look like it was owned by grown ups, before sending out flat warming invites.  In the moment we had to think quickly because Mum and Dad were waiting for a response. While we could've just explained the whole decorating situation, a pang of self-imposed guilt crept in.
eighteen plus
I also wanted them to think that we had evolved from our student lifestyle, into big people with floor rugs and light fixtures.  So instead we said 'OK, see you then, can't wait'. In seconds, the mood had changed from calm and dreamy to panicked and confused.
We realised that even if we cleared up all the paint, tools and mess in time for the visit, we didn't have a sofa, chairs...or even a rug. 
All we had were the bare floors.  Where exactly would they sit down to chit-chat and eat?
bare floors
curved sofa
We'd been gifted a beautiful curved sofa but it was far too big and cumbersome for our tiny living room.So we donated it back and decided to save up for four arm-chairs instead.
There is a storage box installed along the full length of the living room wall. It was used as a platform to hold our indoor garden (lots of adopted plants).   We had planned to clean, sand and repaint the box, and then install a mirror and soft lighting on the back wall to create 'depth'.
We would then re-arrange the plants in front of the mirrored wall to create a scenic 'indoor garden'.  The light streaming in from our large window already made them look quite gorgeous in the daytime.   For now though, the platform was just a big dirty white box on one side of the room.

Window Seat Cushion Epiphany

We brainstormed our seating options. First we though we could make a seating area with scatter cushions arranged on the floor. This can look very sophisticated with the right backdrop, lighting and accessories.
 However, in our messy living room, floor cushions might have reminded Mum and Dad of the day they'd visited our student 'accommodation'.
I'd always admired the window seating seen along the hallways of stately homes. As soon as that thought crept in, we knew what we had to do.  We decided to create a temporary seating area out of the white box.  Although neither of us had ventured into this design and decor territory before, it felt do-able. We decided to roll up our sleeves and dive straight in.
My husband stayed home and prepared the foundation for our project.
He was in charge of sanding, painting , washing off paint splotches, scraping off dried on paint, and removing masking tape 
He also had the rather fun task of speed paint drying with large floor fans.
a shopping list of upholstery tools
I went out shopping with the arm chair savings and bought: 15 yards of chenille fabric, high density poly-foam, Dacron, and thread.
I also bought bobbins, needles and a few extras for my sewing machines - a Vintage Hand Crank and an Electric Home Sewing Machine.

Creating the Window Seat Cushions

Step 1 included measuring and cutting the seat cushion foam, and then wrapping each section in Dacron . Here you can see that the chenille fabric had been measured out, and  the seat , border and zipper panels have been shaped and cut out for each seat cushion.
 The task ahead felt easy and I estimated approximately 35 minutes of sewing for each cushion cover, followed by 10 minutes of stuffing and smoothing .
Strangely, it hadn't occurred to me at this stage, that seating includes a backrest, but more on that later.
seat padding covered with Dacron
I was so determined to make this work. I felt well-equipped for the project and excited to test out a new home decor  skill.

Electric Home Sewing Machine

Finally it was time to sew every thing together. I had estimated 35 minutes of work for each cushion, but in my case, that proved to be ambitious to say the least. The electric sewing machine had been well-oiled, but hadn't been professionally serviced. It was noisy enough to disturb our neighbours.
home sewing machine
By 8 pm they must have assumed we were drilling, because they repeatedly banged on the wall as in 'please stop'.  After 30 minutes of broken needles, nested thread, shredded fabric and sewing curves instead of straight lines(?!), I finally gave up.

Vintage hand-crank sewing machine

I love this machine, it's heavy duty and I knew that it wouldn't annoy the neighbours because it emits only a very low hum when sewing, almost silent in fact.
Brilliant.
I figured that sewing through the night would be easy, sound free and a very small sacrifice to make for a custom-made seating arrangement.
What actually happened was: The timing of the machine was knocked several times,   
vintage hand-crank
At this point, I hadn't sewn a single decent stitch. I had made a number of nests, and either bent or broken all of the needles that I'd bought for it. I had to search around in my sewing kits for stray needles.
dismantled vintage sewing machine
I dismantled and cleaned the machine thoroughly, assuming that was the solution to broken needles, bunched up thread, and fabric getting munched-up by the needle plate.
Much as I detest defeat, I quickly got tired of resetting the timing. 

Oh My Goodness!!

I was feeling unbelievably jarred, the whole project was becoming a complete bore of a chore.  I briefly toyed with the idea of buying bean-bags from Argos and covering them with a blanket....
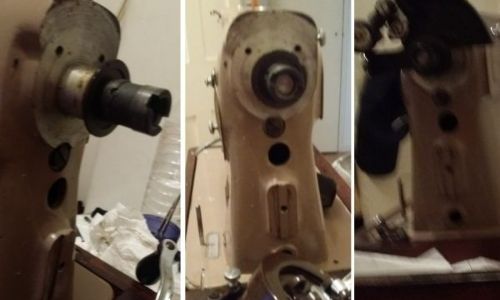
A poor workman blames his tools - I hadn't treated my machines properly and now they were failing me when I needed them most.
I had no choice but to resort to the basics. This is the equipment I finally used to get the job done:  A basic sewing needle, polyester thread and a thimble.
I slept off at about 3.30 am. We put the finishing touches together later that morning. So here it is:
needle, thread and thimble

Et Voila....'The In-law Seating'.....

white and red cushions on grey seat cushions
They were arriving soon and we had to get ready and prepare lunch .
We had bought the red and white and black and white  cushion covers months ago, and had intended to use them as floor cushions in the bedroom.
But for now, the Window Box Seating was 'complete'. 

I'll finish the story:

Well, we engaged in polite conversation. Nothing was said about sparse seating arrangements or fresh paint smells.  Suffice to say I had high-level anxiety all the way through the afternoon, especially when the 'what ifs' set in:

What if:

I'd left pins in the seat cushions?
the speed drying hadn't set the paint well?
the heat from the central heating reverted the paint back to wet goo?
my inlaw's trouser leg got stuck to the box?
white paint stains on grey fabric
Luckily, I'm meticulous when it comes to sharp objects,  so the one thing I was sure of,  was that I'd been careful to count my pins as I went along.
I tried to play it cool and hostess-like, while my lovely in laws balanced food trays on their laps and tried to apper relaxed.
Remember the backrests I forgot to include in the seating design? Well I actually caught my father-in-law peeking behind the scatter cushions to reveal the hard bare wall, let's just say he didn't bother to lean back again.
As they were leaving, they said they'd enjoyed themselves, and  now they visit all the time.

Seat Cushions Reloaded

I had spent a lot of time on a project that I'd been  unprepared for, but now more than ever I was determined to create the seating that we had envisioned in the beginning.
cushions, cushions seats on brilliant white wooden box
We kept the new seating where it was and  found  a new home for the succulents.
Most of the sofa budget had been spent on fabric and tools, plus I'd hand-stitched three seat cushions already.
I decided to finish the rest of the  seating arrangement in the same way.
So that's what I did. I even added a backrest  and some custom cushions to the look. Yes, it took the best part of a week to complete (probably even longer as I had lots of other projects to work on), but I think the end result was worth it.  Thanks to my lovely in laws, I discovered a new hobby.

Lessons Learned:

green tick
Allow plenty of time to ponder, design and create, especially when it is a first time project.
green tick
Check supplies.  Some items like thread can be substituted if it runs out,  but supplies like decor fabric can not.
green tick
Decide which tools to use and make sure they are balanced, oiled, sharpened etc, before its time to use them
green tick
Piled fabric pieces must flow in the same direction. One of my cushions looks lighter because the fabric was attached incorrectly.

Leave a Reply

Your email address will not be published. Required fields are marked *

cross